Click to view the installation diagram and access the installation PDF document.
Introduction
Overview
This guide provides step-by-step instructions for installing the 2019+ 6.7 Cummins delete pipe with muffler. By removing the factory diesel particulate filter (DPF), this modification improves exhaust flow, reduces exhaust gas temperatures (EGTs), and enhances throttle response. However, removing the DPF may void your vehicle's warranty and is subject to emissions regulations. Ensure compliance with local laws before proceeding. Note: This modification is intended for off-road or race use only. Ensure compliance with local emissions laws before proceeding.
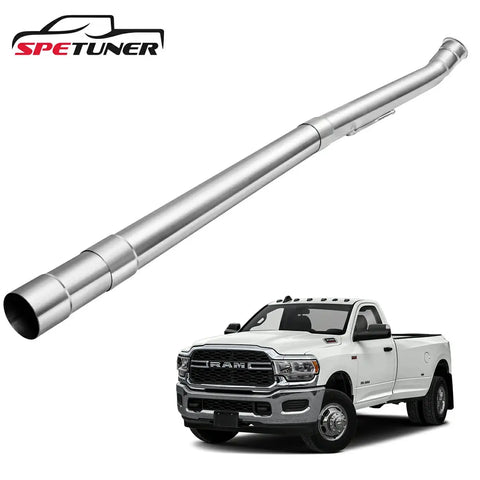
Designed specifically for the 2019-2023 Dodge Ram 2500/3500, this 4"/5" 6.7 Cummins DPF Delete Race Pipe is ideal for enhancing the performance of your diesel pickup truck. Significantly increase engine power output and optimize fuel efficiency by removing the DPF.
Vehicle Compatibility
- 2019+ RAM 2500/3500 with 6.7L Cummins Engine
- Designed for downpipe-back installation
Installation Difficulty
- Skill Level: Moderate (basic mechanical knowledge required, including familiarity with exhaust systems, clamp installations, and proper torque application).
- Estimated Time:2-3 hours

Pre-Installation Preparation
Required Tools
- 13mm, 15mm, and 17mm wrenches
- Torque wrench (45-50 ft-lbs recommended)
- WD-40 or similar lubricant
- Jack and jack stands
- Safety gloves and goggles
Parts Checklist
Ensure you have the following parts before beginning the installation:
- ✅ Race Pipe (#21958)
- ✅ Axle Pipe (#21959)
- ✅ Tailpipe (#21960)
- ✅ Muffler replacement pipe (#50230)
- ✅ V-band clamp & extension pipe (if applicable)
- ✅ Factory gasket (retain for reuse)
DPF Removal & Installation of the Race Pipe
Removing the Factory DPF System
Step 1:Remove the six factory sensors from the exhaust system and disconnect any electrical connections to safely detach the factory exhaust components.
Step 2:Starting from the rear of the truck, loosen the clamp securing the axle/tailpipe assembly to the filter. Remove the assembly from the rubber isolators on the frame. Tip: Apply WD-40 or similar lubricant to ease hanger removal.
Step 3:Remove the four nuts securing the rear canister to the front section. Caution:This part is heavy, so use a second person or a stand for support.
Step 4:Detach the factory hanger bracket near the flange to make removing the next canister easier.
Step 5:Move to the front canister where it connects to the downpipe. Loosen the nut on the V-band clamp, then remove the clamp to detach the canister. Retain the factory gasket for reuse.
Installing the Race Pipe System
Step 6:Slide the front Race Pipe (#21958) over the two cross-members and connect it to the downpipe using the factory clamp and gasket. Ensure the hanger is correctly seated in the rubber isolator. Tighten the connection just enough to hold the pipe in place but allow for slight adjustments if necessary.
Step 7:Install the Axle Pipe (#21959) and Tailpipe (#21960), making sure all pipes are properly engaged in their respective hangers and securely fitted into one another.
Step 8:Using a stand for support, install the muffler replacement pipe (#50230) onto the axle pipe. Measure the gap between the muffler and front Race Pipe (#21958) to determine the required extension pipe length. Trim the extension pipe if necessary, ensuring that only the non-expanded end is cut.
Adjustments & Final Tightening
Step 9:Once all components are in place, double-check the alignment. Make any necessary adjustments before tightening all clamps, starting from the downpipe and working towards the rear of the truck. Torque clamps to 45-50 ft-lbs using a high-quality torque wrench, such as a Snap-on or Tekton model, to ensure proper tightening.
Step 10:(Optional)To enhance security, apply a small MIG weld under each clamp to the clamped pipe connections. Do not weld the clamps themselves, as this may cause structural damage or make future adjustments difficult.

Final Inspection & Testing
Post-Installation Checks
✅ Start the engine and inspect for any exhaust leaks.
✅ Ensure that the Race Pipe does not contact the chassis, suspension, or other components.
✅ Take the truck for a short test drive, then recheck all bolts and clamps for tightness.
Maintenance & Care Tips
- Regular Inspections:Check clamps and bolts every 5,000 miles to ensure they remain tight. In high-humidity areas, inspect for rust or corrosion and address any signs of wear accordingly.
- Cleaning:Keep the exhaust system free from excessive dirt and debris. If necessary, apply high-temperature corrosion-resistant coating.
- Storage Considerations:If the truck is not used for an extended period, inspect the pipe connections for rust or looseness before operation.
How to Tune after installing the 6.7 Cummins DPF Delete Pipe
After installing your DPF Delete Race Pipe, tuning your truck's Engine Control Unit (ECU) is a mandatory step. Without a proper tune, your truck will experience check engine lights (CEL), reduced power (limp mode), and poor drivability. A proper delete tune communicates with the ECU to ignore the missing sensors and DPF, optimizing fuel delivery and exhaust flow for your new hardware setup.
For the best performance, reliability, and ease of use, we highly recommend the following tuners:
1. EFI Live AutoCal V3 DPF Delete Tuner
The EFI Live AutoCal V3 is the industry standard for custom diesel tuning. It allows you to flash custom tunes directly to your ECM, providing tailored performance for your specific vehicle setup.
- Compatibility: 2006-2021 Dodge Ram Cummins & 2001-2016 Duramax
- Features: Holds multiple custom tunes, reads and clears Diagnostic Trouble Codes (DTCs), and provides unmatched reliability for heavy towing or daily driving.
- Get it here: EFI Live AutoCal V3 DPF Delete Tuner
2. Mini Maxx V2 Tuner and EGR/DPF/DEF Full Delete Kit
The Mini Maxx V2 is an excellent all-in-one solution that provides pre-loaded box tunes for a quick and easy setup. It also acts as a digital gauge display to monitor your engine's vital parameters in real-time.
- Features: Pre-loaded with DPF/EGR/DEF delete tunes, shift-on-the-fly power levels, and full digital gauge monitoring capabilities.
- Get it here: Mini Maxx V2 tuner 6.7 cummins
If you are looking for an all-in-one bundle, check our complete 6.7 Cummins delete kit for 2019-2021 Ram Dodge Ram 2500 RAM3500 6.7L Cummins
By following these detailed steps, you can successfully install the Cummins DPF Delete Race Pipe on your 2019+ 6.7L Cummins truck, improving exhaust flow and overall performance.
FAQ
Q1: What vehicles are compatible with this DPF Delete Race Pipe?
A1: This system is specifically designed for 2019 and newer RAM 2500 and 3500 trucks equipped with the 6.7L Cummins engine.
Q2: Is it legal to drive my truck on the street after installing this pipe?
A2: No, this modification is strictly intended for off-road or race use only. Removing the factory DPF is subject to emissions regulations and may also void your vehicle's warranty.
Q3: Do I need an ECU tune after installing the race pipe?
A3: Yes, ECU tuning is highly recommended after installation to avoid check engine lights (CEL) and to properly optimize your truck's performance.
Q4: Do I need to purchase a new gasket for the installation?
A4: No, the guide instructs you to carefully remove and retain the factory gasket from the downpipe connection so it can be reused with the new Race Pipe.
Q5: What is the recommended torque specification for the exhaust clamps?
A5: All clamps should be torqued to 45-50 ft-lbs using a high-quality torque wrench to ensure a proper seal and prevent leaks.
Q6: Why do I hear a metallic rattling sound after finishing the installation?
A6: This is typically caused by improper pipe alignment. You should double-check that all hangers are securely in their isolators and that the pipes have adequate clearance from the chassis and suspension components.
Q7: Are there any specific tools required to complete this job?
A7: Yes, you will need 13mm, 15mm, and 17mm wrenches, a torque wrench, WD-40 (or similar lubricant) to help with the rubber hangers, a jack, jack stands, and safety gear.
Q8: Is it necessary to weld the new exhaust system?
A8: Welding is completely optional. The system is designed to be clamped together, but for enhanced security, you can apply a small MIG weld to the pipe connections under each clamp. You should never weld the actual clamps themselves.
Q9: How often should I perform maintenance on the new race pipe system?
A9: It is recommended to perform a regular inspection of the clamps and bolts every 5,000 miles to ensure they remain tight, and to check for any signs of rust or wear, especially in high-humidity areas.
Q10: Can this kit be installed as a direct replacement for the factory DPF?
A10: Yes, the Race Pipe is a downpipe-back system engineered to fit directly with the factory downpipe using the original V-band clamp and factory gasket.

Lars
Diesel Performance Engineer | 15+ Years EXPERIENCE
"Empower Your Beast: Run Cooler, Pull Harder, Last Longer."